The Qwik, Astro, Audiofeed Experiment
This is an experimental blog post where i’ll write a very brief ‘How to…’ guide for creating an Astro site and add Jack Shelton’s superb @qwikdev/astro integration.
With Audiofeed I’m able to create a video, with audio, using only the text and images seen in this post. Creating ‘How to…’ content using AI, in my opinion, is a brilliant solution to a problem I’ve encountered on multiple occasions when attempting to learn something new.
The DevRel Video Problem
Videos recorded by humans quickly become out of date, and there’s no way to update them (other than to rerecord them) still, many tech companies (Supabase) leave these out of date videos published on sharing platforms, and in some cases, in their actual documentation!
By using written content that is converted into audio, and screenshots inserted as slides, an AI solution means updates and changes can be made as and when required. When things change (and they do, often) a new video can be created with the click of a button.
No more out of date misleading videos littering the docs!
Audiofeed
Audiofeed has been created by friend, ex-Gatsby colleague, and all round mega-dude Shane Thomas. It’s early days for the product but it’s looking good. Whilst this video feels a little rudimentary, I think the potential is clear.
Below you’ll find the finished experiment (an AI generated video), and below that is the actual ‘How to…’ guide. At the bottom of this post I’ll explain how it was made.
Getting Started with Astro
If you don’t already have an Astro site, head over to the docs to get started https://docs.astro.build/en/install/manual/. There are a number of ways to kick start your Astro project, my preference is to follow the manual install. It’ll take you about 30 seconds longer than using the CLI, but you’ll probably learn something… which is nice.
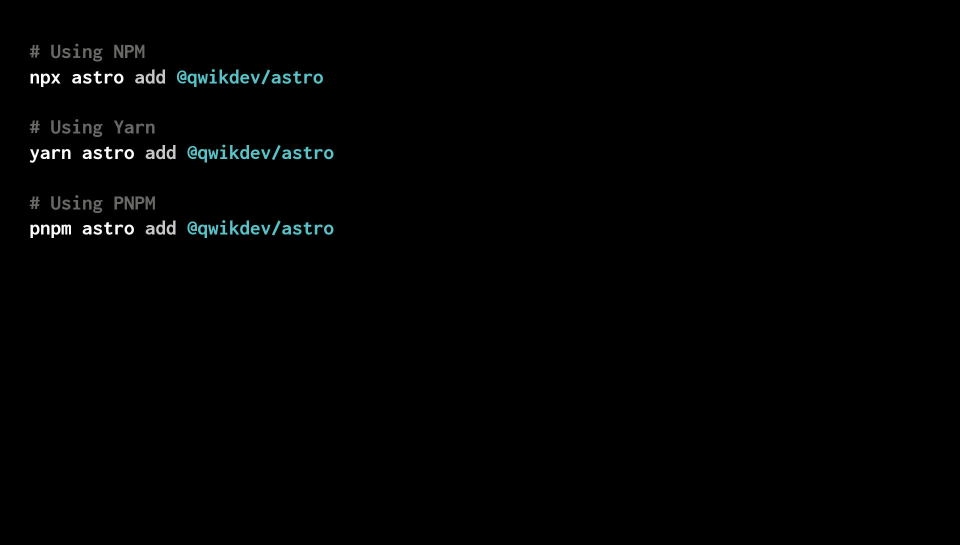
Install the Qwik Integration
As before with installing Astro, there are a number of ways to install the integration. I prefer to use yarn but you can use npx, pnpm or yarn. Type one of the following in your terminal.
# Using NPM
npx astro add @qwikdev/astro

# Using Yarn
yarn astro add @qwikdev/astro

# Using PNPM
pnpm astro add @qwikdev/astro
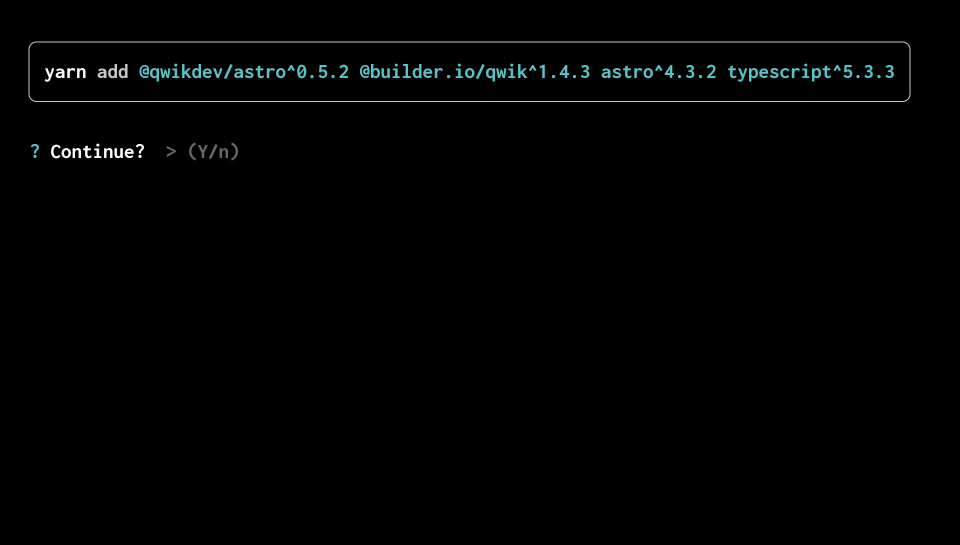
You’ll then be prompted to confirm it’s ok to install the required dependencies. Press the Enter key to continue.
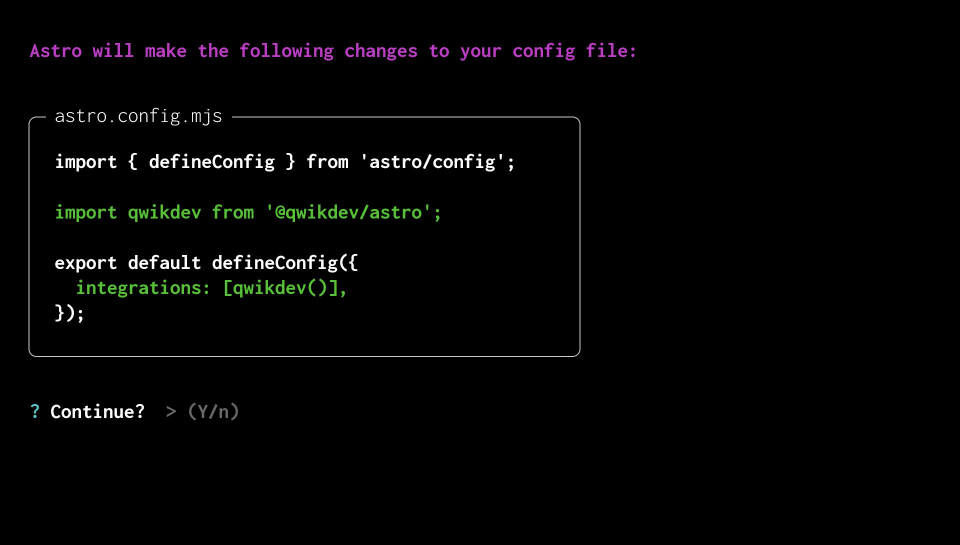
The final prompt from the CLI is to confirm it’s ok to update your astro.config.mjs file with the qwikDev integration.
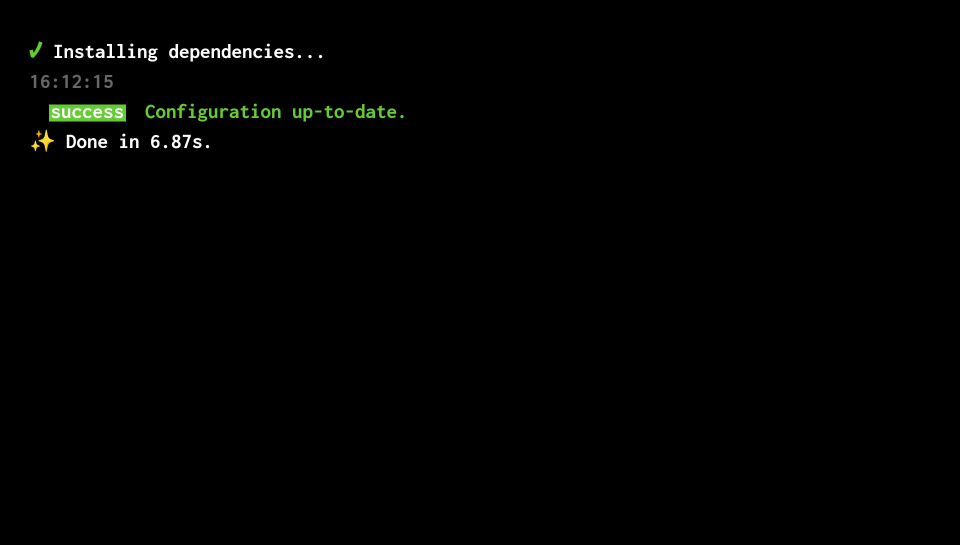
If all has gone to plan the dependencies will install, the config will be updated and you should be looking at a message in your terminal that says success. Configuration up-to date, and Done.
Creating a Qwik Component
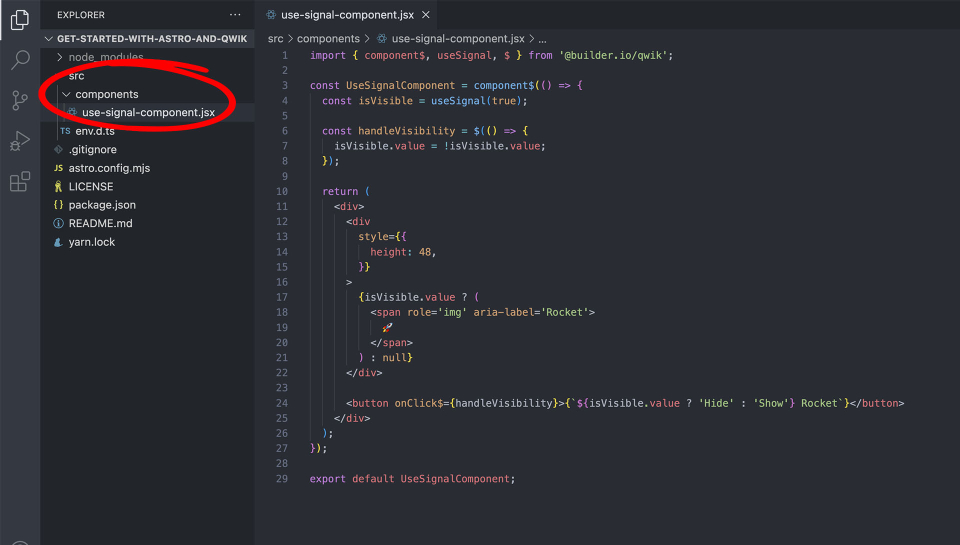
Create a new directory named src (if you don’t already have one), then create a directory named components (if you don’t already have one). Inside the components directory create a new file. I’ve named mine: use-signal-component.jsx, but Qwik also supports the TypeScript .tsx extension.
This simple component uses useSignal which, if you’re familiar with React is a little like useState, and will be used to hold a boolean value of true or false.
There’s a function named handleVisibility which will be called by the onClick event handler attribute on the button which sets the boolean value of isVisible to true if its false, and false if it’s true.
The isVisible value can then be used with a conditional (ternary) operator to determine if the Rocket emoji is returned or not.
import { component$, useSignal, $ } from '@builder.io/qwik';

const UseSignalComponent = component$(() => {
  const isVisible = useSignal(true);

  const handleVisibility = $(() => {
    isVisible.value = !isVisible.value;
  });

  return (
    <div>
      <div
        style={{
          height: 48,
        }}
      >
        {isVisible.value ? (
          <span role='img' aria-label='Rocket'>
            🚀
          </span>
        ) : null}
      </div>

      <button onClick$={handleVisibility}>{`${isVisible.value ? 'Hide' : 'Show'} Rocket`}</button>
    </div>
  );
});

export default UseSignalComponent;
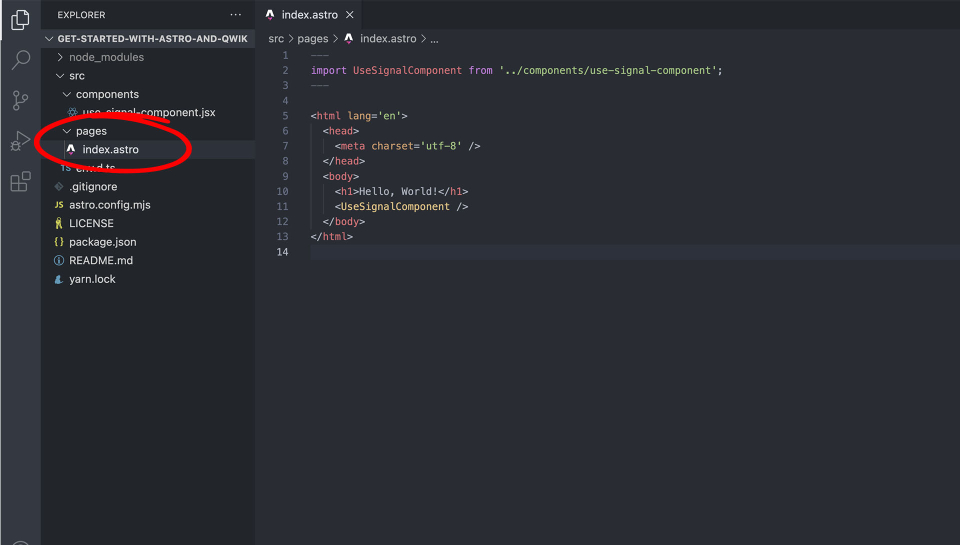
Creating an Astro Page
Create a new directory in src named pages, (if you don’t already have one) then create a new .astro file. I’ve named mine: index.astro. Add the following code to import the Qwik component and add it to the page.
---
import UseSignalComponent from '../components/use-signal-component';
---

<html lang='en'>
  <head>
    <meta charset='utf-8' />
  </head>
  <body>
    <h1>Hello, World!</h1>
    <UseSignalComponent />
  </body>
</html>
Preview The Page
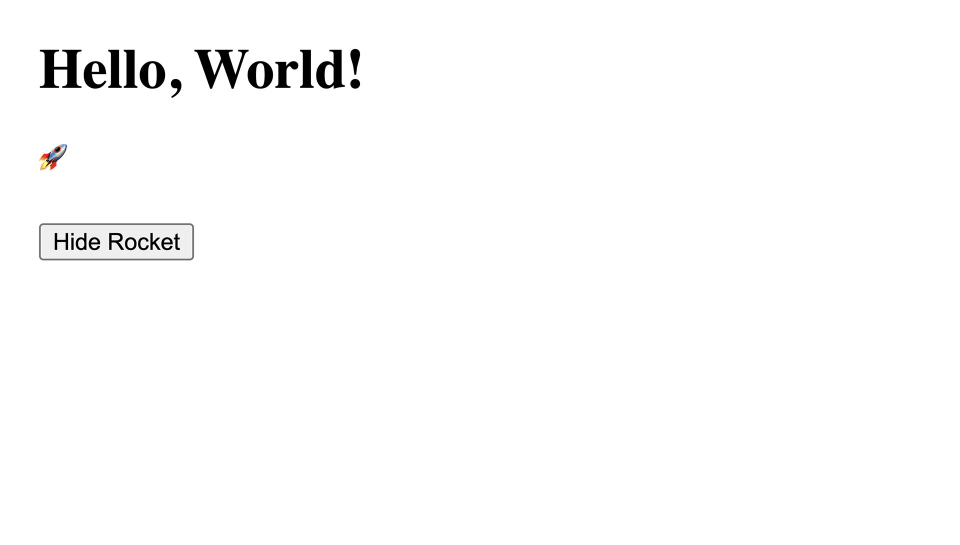
If you’re seeing no errors, and your dev server is running (type npm run dev if it’s not), then navigate to the page you just created. In my case I created an index page so will be able to preview my page on the root localhost URL.
By default the Rocket will be visible because the default value in the useSignal is set to true.
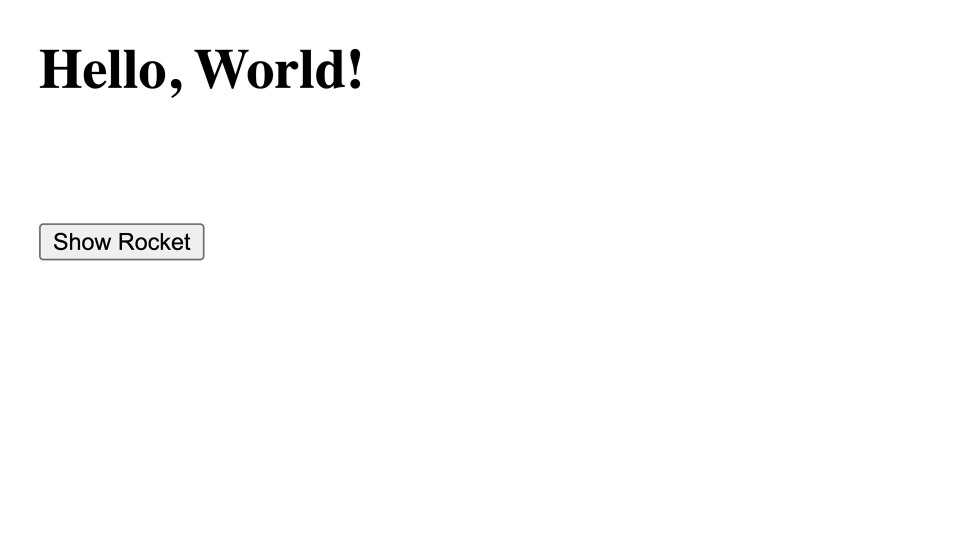
And as you’d expect, if you click the button, the useSignal value will be set to false and the Rocket won’t be returned.
Finished
And that’s it. You now have Qwik installed and working. Congratulations.
The Making Of
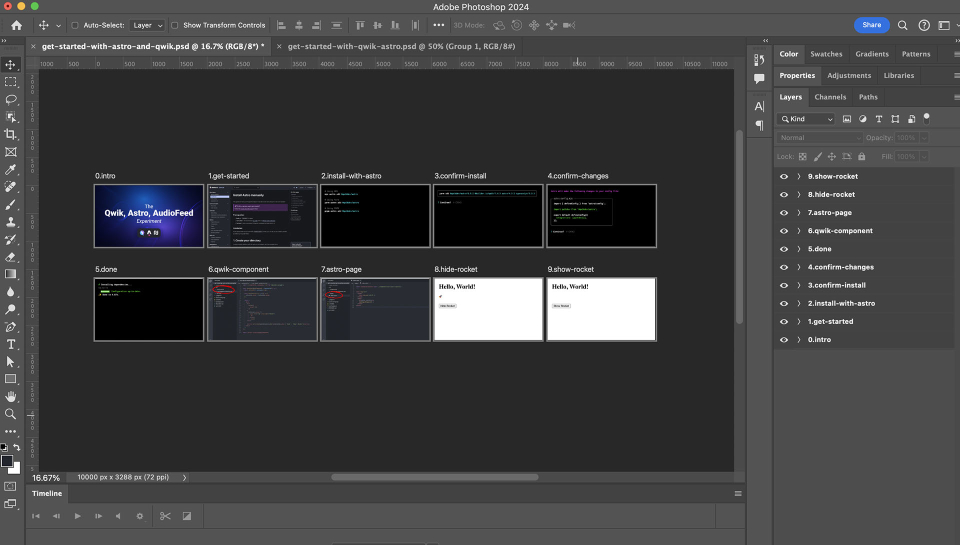
Naturally, my first step was to write the code so I knew the steps required to write the guide. The next step was to create an Artboard in Photoshop for each of the images used in this post, (which will later become frames of the video). In cases where it’s a “terminal output”, i’ve recreated a terminal window using Photoshop’s shape tools and added editable text layers for the text.
Creating Frames In Photoshop
Creating these “frames” in Photoshop as Artboards allows me to very quickly make changes, then export all Artboards in one go using a Photoshop feature: “Export > Artboards to Files…”. With the Artboards exported as individual .jpegs I can now create the segments in Audiofeed.
Creating Segments In Audiofeed
Segments in Audiofeed are where you add text which will be converted into spoken word audio.
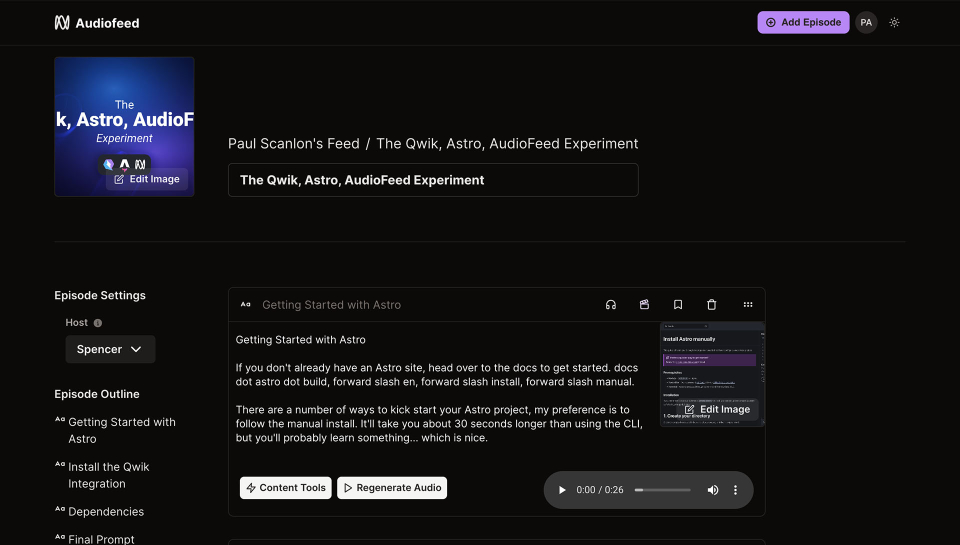
Here you’ll see the option to add an image to each segment, this is where I add the Artboards exported from Photoshop. There are a number of options available to help you redraft what you’ve written under the “Content Tools” menu. You can also select a host for different voice types.
When you’ve added all the segments, and generated audio for each, you can go ahead and publish the episode. Audiofeed will then convert all segments into a single audio or video file ready to be published to Podcast feeds, or downloaded and distributed. It’s pretty cool stuff!
Final Thoughts
If it’s not obvious by now, i’m a proponent of “written first” content. It’s the backbone of developer education, and with a little help from AI, the written word can be so much more.
I believe there are significant business benefits to using this approach. For starters, the whole thing is editable. Making a change to the audio (text) or screenshots can be accomplished very easily, and a quick republish means the video can be updated and redistributed.
Compare that to the significant effort required for a human to rerecord an entire video and then edit it. Moreover, the text editing can be done by anyone, you don’t need any specific software, or (dare I say it) any real skill to make text changes. It’s kinda the same as making a change using a Content Management System (CMS), but the output is more than just text and images.
Don’t quote me on this but, future features from Audiofeed may include the following:
- Automatic closed caption generation from text segments (required for accessibility)
- AI Generated (animated / speaking) Little Face In The Corner (LFITC)
- Intro video upload. (crucial for DevRels keen to plaster their stupid face all over the internet)
- Video Player iFrame Embed code. (Will auto update if changes are made)
I’m excited to watch as the team at Audiofeed develop this product further, and I’ll be continuing to experiment with the format. And who knows, maybe one day soon, we’ll see the end of human recorded, out of date and misleading videos in documentation.
Check it out today at: audiofeed.ai
Oh and I almost forgot.
Audiofeed have a player embed that you can add to any post or article. Here’s an example for something I wrote recently: I’m in an Open Relationship with Remix